
How to Start A Blog on WordPress

I looked up this month and realized that I’ve been blogging consistently now for 5 years! I can’t believe it’s been that long! I started my blog to chronicle our first-home building journey and life along the way with a new baby. Since that time, I’ve gone from full-time lawyer to work-at-home mom (if you consider blogging work), which I really don’t, although I do spend quite a bit of time on my blog.
Thinking back, I’ve learned so much along the way through friendships with other bloggers (essential), blog conferences (I’ll be heading to Haven this week!), reading and watching tutorials on everything from better photography to how to use the latest social media. Although I admit I still can’t quite get the hang of snapchat!One thing I wish I had done differently from the beginning, was start my blog on WordPress. I started my blog the easiest way I knew, on Blogger, and since then, I’ve often thought about moving to WordPress, but now that my blog is established on Blogger, it feels like a big ‘ole pain in the rear to change now. That being said, for most bloggers who blog consistently and want more control and growth opportunities, WordPress is probably the way to go.
If I knew then, what I know now, here’s how I would have started my blog on WordPress.
WordPress is awesome as a blogging platform, but you’ll still need another company to host your site if you ever plan to do any sponsored posts or run ads because if your blog is hosted by WordPress, you are not allowed to run ads or post sponsored content (other than the WordPress provided wordads).BlueHost is a hosting company that I found that has a complete tutorial and video to follow so you can set up hosting yourself. I’m surprised at how easy it is to set up a a blog on WordPress from the get-go, it’s just importing a complete blog and transfering it over that seems to be more complicated and probably requires professional help.
Below, I’ve outlined all the steps to get you started, and they might seem daunting at first, but they are actually pretty simple and you don’t need to know any HTML code at all. If you prefer, just watch this quick video and it will also walk you through the process. BlueHost is having a 50% off sale, so definitely take advantage of that!
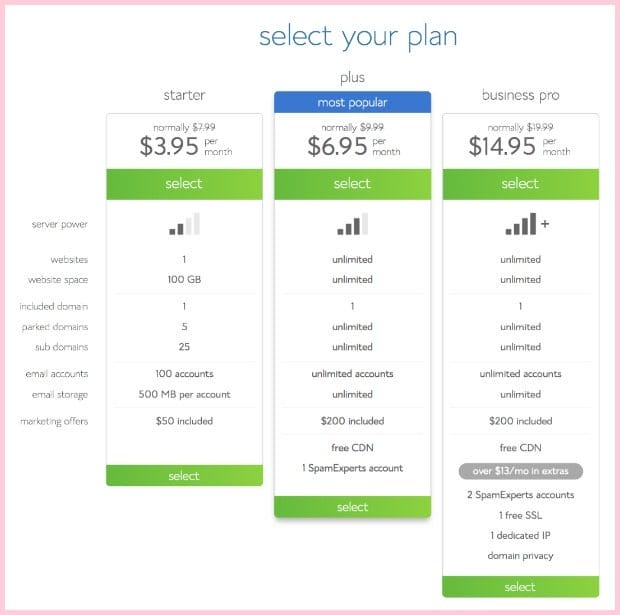
STEP 1 : SELECT A PLAN
STEP 2 : DOMAIN HOSTING
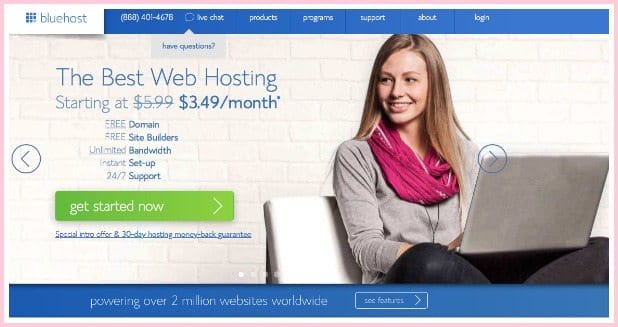
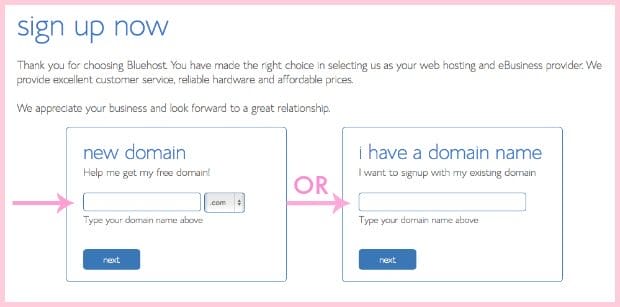
Once you’ve decided what to name your baby, i.e, call your blog (in tech language, your “domain”) you’re ready to get started. Go to Bluehost and click the green button: “get started now.” Your domain name is FREE with Bluehost when you purchase their hosting plan.

If you already own a domain name, you can enter it here, and you will just have to go through a few extra steps to make sure you get your DNS pointed to Bluehost.

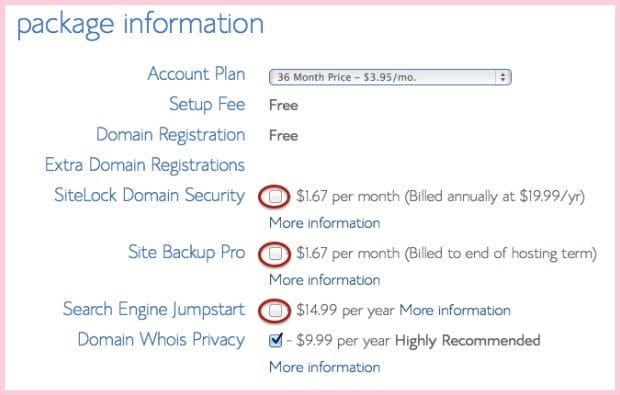
Next, choose your hosting package. Normal, shared hosting is priced at 12, 24 and 36-month terms. To help save you money, the longer term you purchase, the lower the monthly rate will be. At this point, you can also choose other package details, but the important one is domain privacy, which keeps your personal information private on WHOIS databases.
STEP 3 : INSTALL WORDPRESS
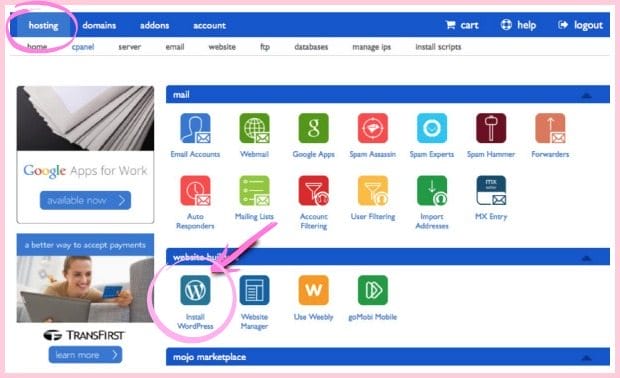
Now that hosting is set up, it’s time to get WordPress installed. Luckily, Bluehost makes that super easy for you. Go to the “Hosting” tab and then click on “WordPress”. Then, choose “Install” and click on “Check Domain” (you can leave the “directory” part blank).

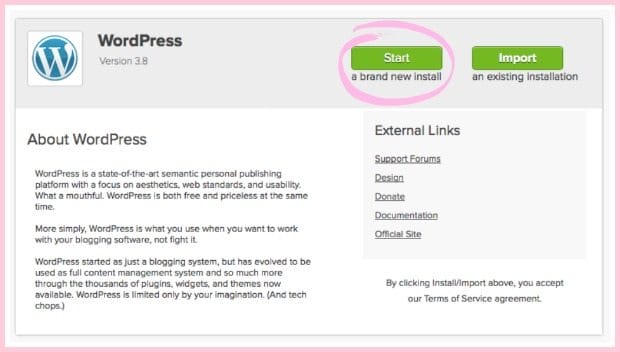
This will open the installation window. Click on the green “Start” button that will start the WordPress installation process, which has a few easy steps.

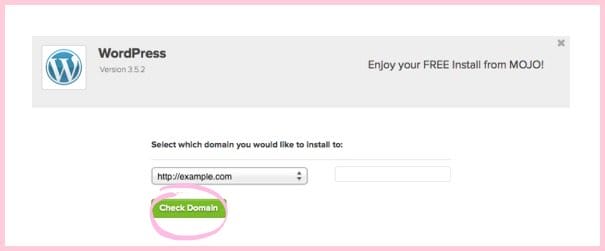
Step 1: Choose where you want to install WordPress. This can be any domain on your account, or a subdomain or a folder for one of your domains. Next, click on “Check Domain,” which will make sure the domain is assigned and pointing to your account. You may get a warning that you are overwriting files, but as long as you don’t have another website built yet, you can check the box that says “Overwrite” and continue. This is mostly to make sure that you really want to install in that location. If you do have other sites built, you will want to make sure you’re not overwriting something important.

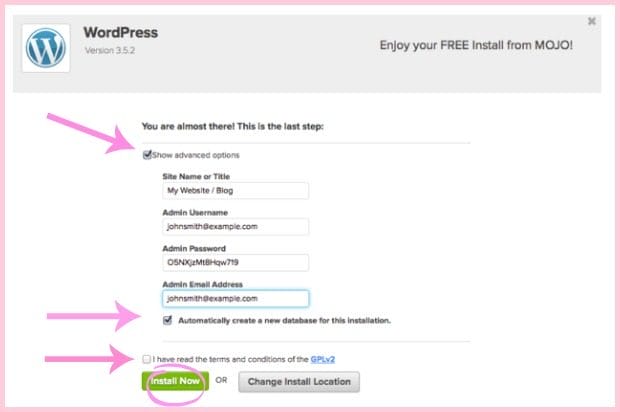
Step 2: Show Advanced Options. Although it says “advanced”, this section just allows you to set up your own username and password for your WordPress install. Make sure that the “Automatically create a new database for this installation” box is checked, unless you have a database already set up that you want to use.
Step 3: After you’ve read the terms and conditions, check the box indicating that you’ve done so, then click “Install Now.”
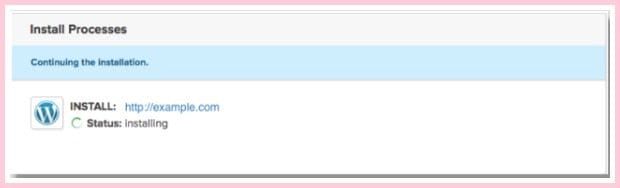
Now you’ll see the progress page, which will show you how far along the installation is.

Once WordPress is fully installed, it will provide you with your site URL, the admin login URL, your username, and password. You will get a copy of this information, except your password, in your email as well. Make sure to keep it in a safe place.Now you can log into your WordPress site by going to the admin login URL. Enter your username and password, then click “Log In.” This will take you to your WordPress dashboard. From here, you can control everything to do with your WordPress site, such as creating pages, writing posts, and changing the appearance.
Remember, if you sign up through this tutorial, you’ll receive a special offer of shared hosting at $3.95/month for 36 months, as well as a free domain name for a year!

Need more help? Check out this video that will walk you through the steps of installing WordPress:
I hope this helps! Happy blogging! I’ll be recapping my weekend at Haven and sharing more blog tips in the coming weeks!For more blogging posts, you can read: 10 Steps to Better Blog Posts
__________________


Thank you Megan! I've been blogging for almost a year now and a few months ago I started thinking about moving to WordPress but I'm not sure how much work goes into moving the content. I'll keep looking into it and hopefully I'll get enough courage to make the move 🙂
I wish I would've started on WP too!
This post couldn't have come at a better time for me! I follow a ton of awesome blogs, yours included of course, and I've been thinking about starting my own but have no clue how to get started! This insight will help a lot!!
Blogging is seriously so fun so if you get started let me know!
Can't wait to hear about the fitness competition!
Thanks Rachel! I'm working on a recap to publish next week!
Megan, You post is coming at a great time for me. I have followed your blog for a little over a year and I had thought about starting a blog this past year to chronicle my love of everything fashion and beauty related. Honestly, I was scared to jump into it because I couldn't determine what my niche or focus would be. This last month, I was diagnosed with breast cancer at 27 and I think that is the push I need to start a blog. I want to start a blog chronicling my journey and navigating the fashion/beauty world through the eyes of a cancer patient. This post made the initial start up process seem less overwhelming. Thank you! Anna Crollman
So glad you are taking the plunge! Wishing you all the best Anna!
HI Megan! I'm a little late to this party! First, let me congratulate you on that sweet baby girl! She is precious!
I have been following your blog recently and would love to join you in the world of blogging. Thanks for the tutorial. It really helps to have some guidance when you don't know where to begin. I am the mom of 3 very active (travel sports) boys. So before I dive into this, I was hoping for a reality check. Approx., how much time a day/ week do you spend on your blog? Also, do you search for deals to share or do the stores alert you of sales to share with your followers? Thanks so much! Tara
Hi Tara! Thanks for the well wishes- we are doing great! I can only imagine how busy you are with those boys, our son plays sports and it's a lot to keep up with! Regarding the blog, the amount of time you devote to it depends on you. It can take me anywhere from 1-8 hours to write one blog post, especially if it's a project where I'm taking and editing a lot of photos. I search for sales and also am signed up to receive email notices from stores I shop of their sales. But it's the same email you would get if you signed up on their email list. 🙂
Oh my goodness! I just did it and now I am scared to death, lol! Seriously I have saved this post and read it several times and decided to finally take that leap of faith. Thank you so much for breaking it down and making the process so easy. I have been following your blog for quite some time and like many I have become inspired to do something to satisfy my creative side. Fingers crossed!
Hey! So if I use blue host and pay for that per month, do I need to pay for the WordPress account that allows ads? I know there is a personal and premium options for WordPress and the difference is the Premium allows Wordads (I guess that is Word press only ads? and that is why it is important to do another hosting sight??) aclaude@ufl.edu
So I want to start a blog but am torn on what to write on! I teach kids dance do I love kids but I also love fashion and cooking! I looked at a few blogs you had as examples and some touched on all three things! Could I possibly do that also?
Regards
Deep Web
crazyask.com
Thanks for sharing this wonderful article. I hope i will soon start my blog in wordpress.!
Good for you!!
Nice blog for startup blogger.
Amazing Post!
Thank you for advice, I really appreciate your efforts on writing this post.
To start a blog on WordPress, sign up for a hosting provider, install WordPress, choose a theme, and begin creating and publishing content through the user-friendly interface and you can visit CMOLDS Dubai one of the ahref=”https://www.cmolds.com/web-development-company-dubai”>best web development company in Dubai because of their services in skills.