
DIY {Paint Chip Art}
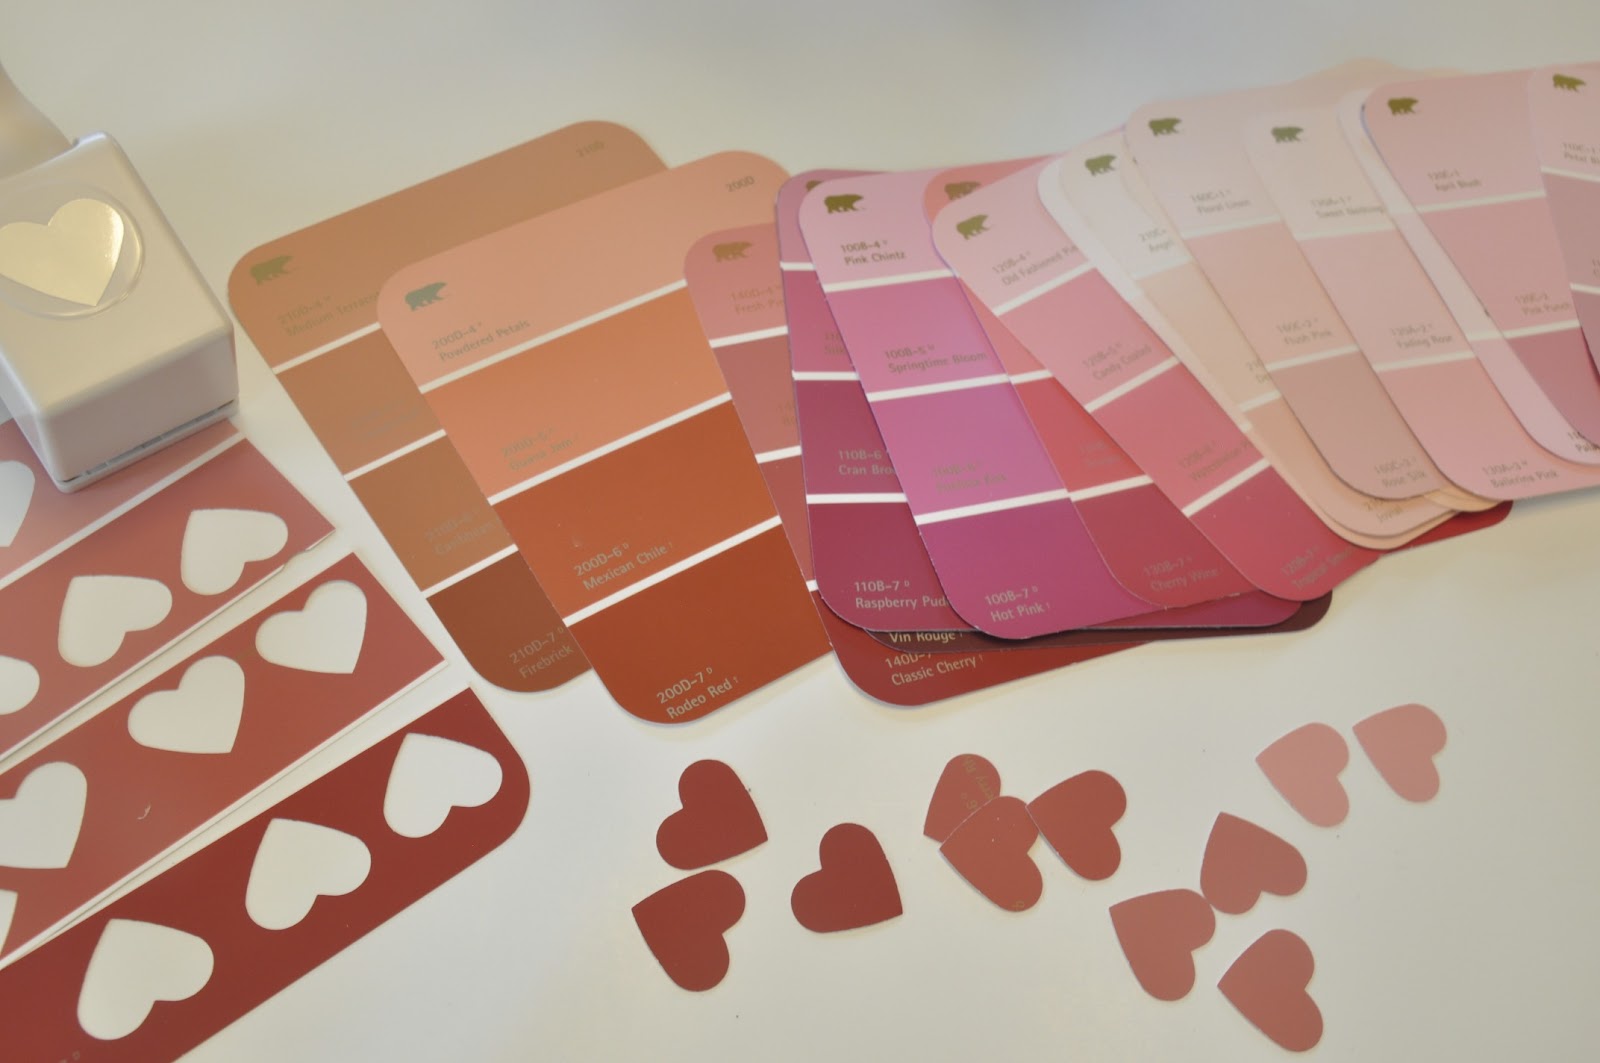
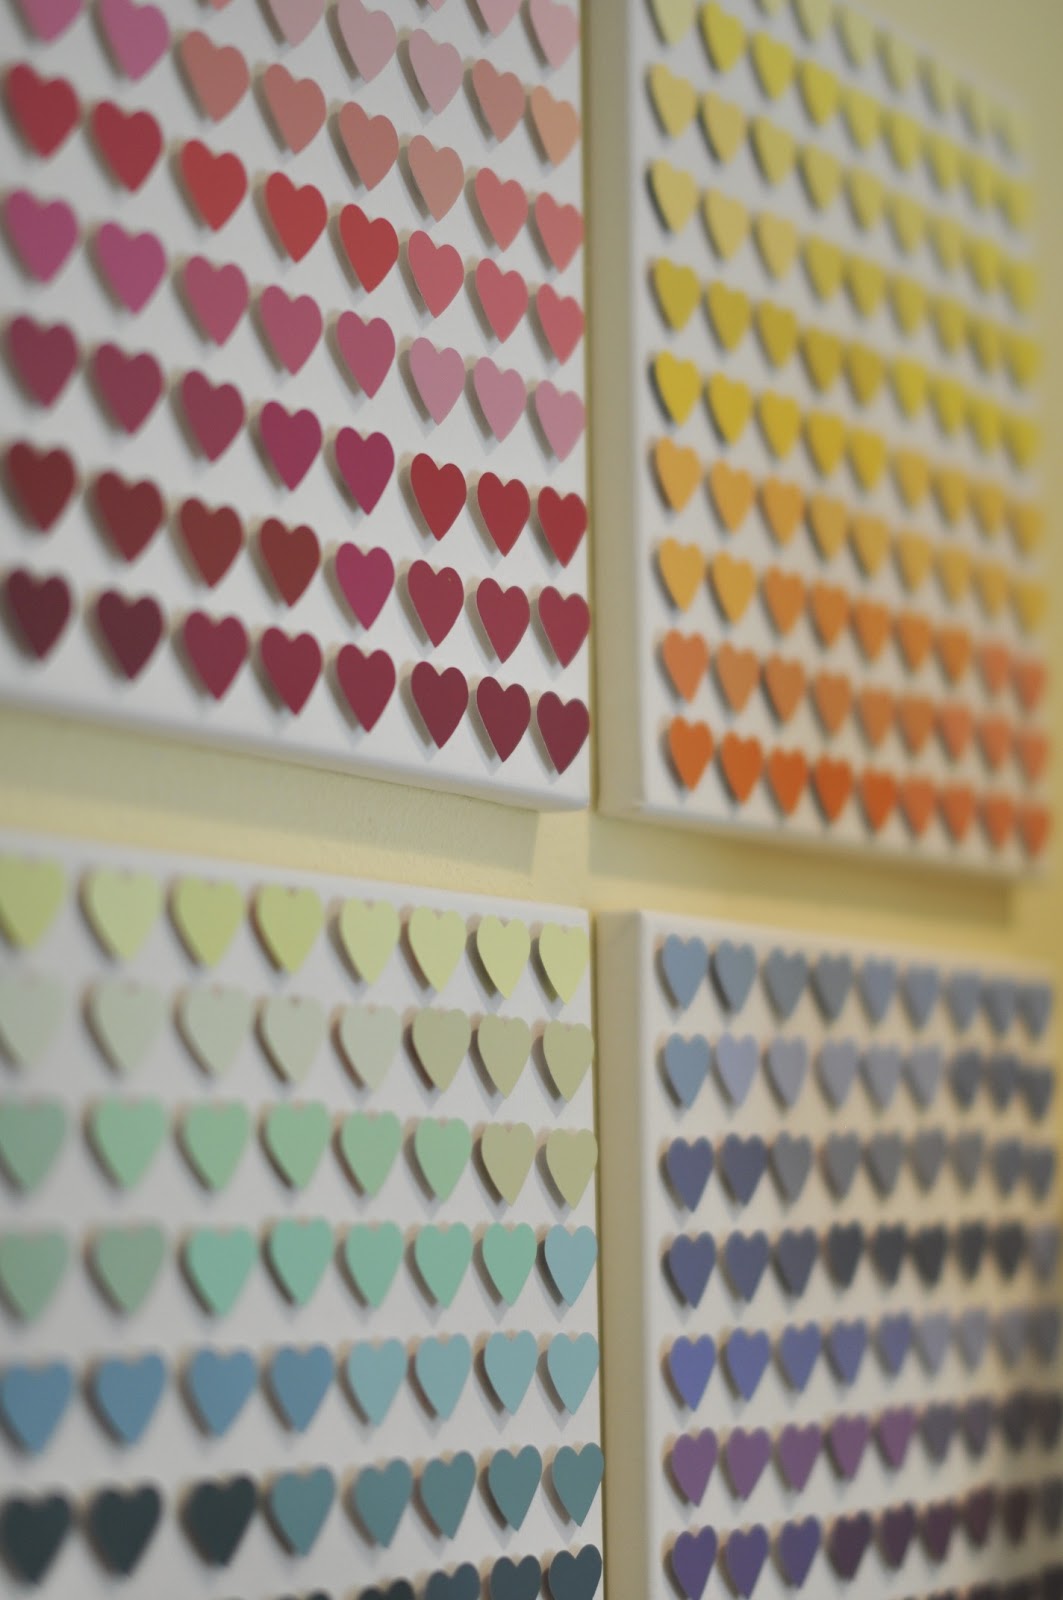
What began as a Valentine craft project turned into a broader crafty art idea. Does that happen to you? You start out with one goal in mind and then once you get into it, the project takes a different direction? Originally, I collected paint chip samples in varying shades of pink and used a Martha Stewart heart punch to cut out a bunch of hearts that I planned on attaching to a single square canvas. Since Valentine’s day is all about love, I thought it would be cute to hang some hearts in our kitchen or entryway.
Then I got carried away . . .


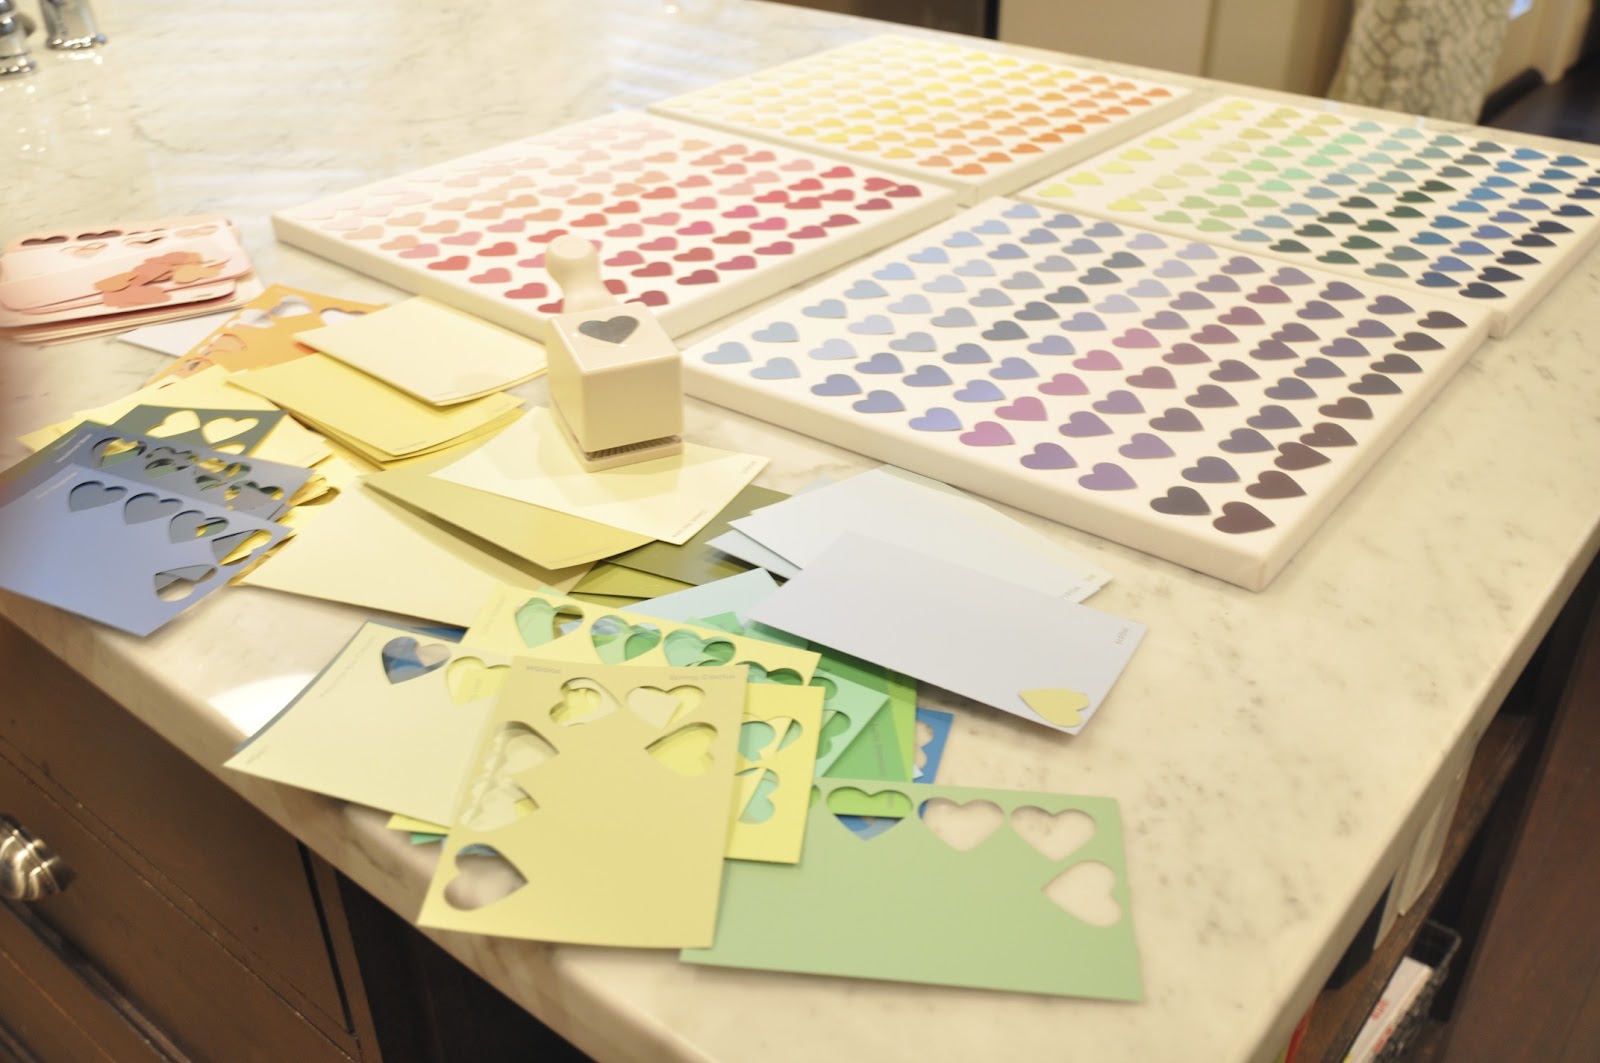
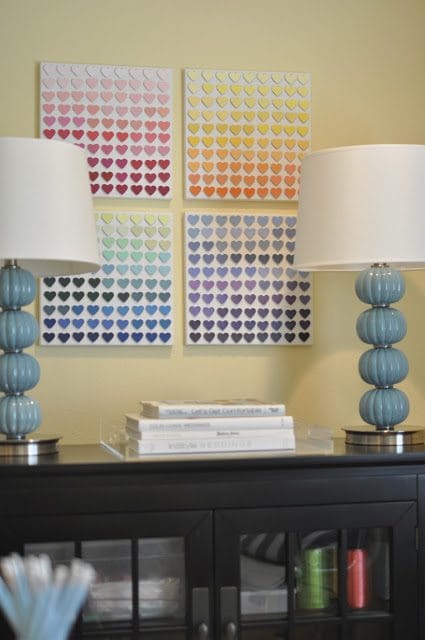
I ended up collecting all colors of the rainbow and punching out hearts in all of them. The punching is easy (and quite addictive), taking just a few minutes to punch out a gazillion. And since I had more canvases, I spread them out onto four squares.
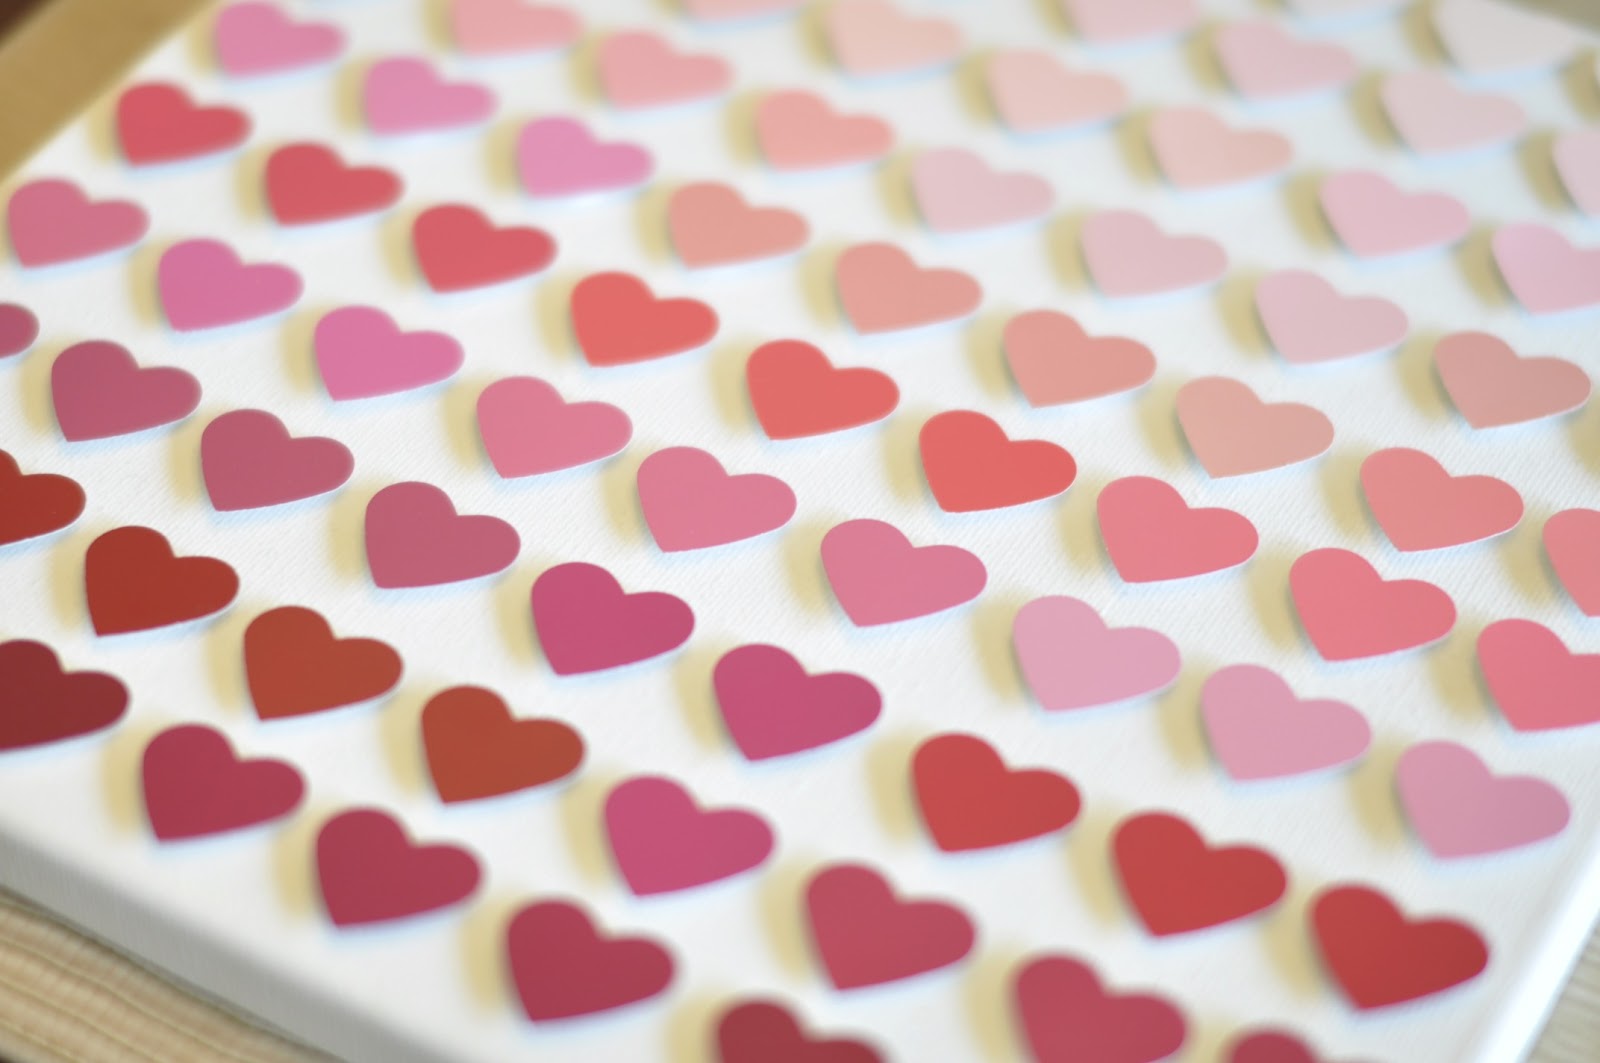
To give the art dimension, I used adhesive foam circles to affix the hearts to the canvas. I just eyeballed the placement of the hearts and tried to keep the lines straight.


There are 90 hearts on each canvas. It took about 2 hours to stick 360 hearts onto these canvases.

Then I had to figure out where to put them. James’ room? Too much on the walls already. The hallway? No. But my office happily welcomed them!

Who says hearts are only for Valentine’s Day?!
I’m sharing this post at Somewhat Simple.
* * * * *


I love the hears in all the different colors! I have been gathering lots of green paint chip samples lately as potential color choices for our kitchen. It would be neat to do something similar with them. Maybe with a leaf cutout.
That looks great! I linked up too, I made my daughter a bow holder
This is so cute! I love how they pop up from the canvas – great job Megan!
I love this! I'm definitely going to try it!
I love a gorgeous craft which required me to buy *nothing* (I have everything I need to do this!!) Thanks for posting`I'll be pinning 🙂
~Elena
http://acasarella.blogspot.com/
OK…that is WAY cool!
I love this project! I am pinning this and doing it next Valentine's day! I also took on the Pinterest challenge:
http://domesticfordummies.com/2012/03/challenge-accepted-and-completed.html
This is adorable!!! I love your blog!
Oh, super cute!!! I love how colorful and whimsical it is…perfect for your office. 🙂 I joined the Pinterest Challenge this time too!
I'm impressed. Maybe I could incorporate a boy shape to the upcoming nursery! I'm not very crafty though 🙂
Where did you find your living room rug? Love the pattern.
Megan, I LOVE this! Great job!
I did some heart art as well, but the adhesive circles are brilliant, they give it a nice dimension!
Love is in the air! You should have a look at Jennifer Brouwer's blog, your homes are both so cheerful and full of love! http://www.jenniferbrouwerdesign.com/interior-design-portfolio.html
i loooove this!!!! perfect for spring and so pretty!!!
I can totally see how punching out those little hearts can be addicting! Love the dimension you added with the foam circle stickers. These are so fun – I think I need to make one or four myself! 😉
This is crazy cute! Absoutely love it!!
Inspired! Love this, looks great and its a really lovely project!
Sooooooooooooo cute!!!!!
Oh my goodness! What a project! It looks awesome!!!!
This is so cool! I love the idea – nice work on the DIY art and thanks for sharing! 🙂
I love it! I especially love that the hearts are raised off the canvas.
so so cute! u could sell that on etsy!
Wow, what a great DIY!! I agree that the fact they are raised makes it look extra special…as it should since it was a wee bit time consuming 🙂 Well done.
I absolutely adore this!! I am going to be a total copycat and make a similar one for our future playroom! Wow – love!!
I love these!!! And when you scroll down the post, it looks like they're moving! Or maybe that's the acid I dropped this morning? I'm kidding!
These look great in your office, esp next to those lamps! Thanks for linking up chica!! oxoxoxox
Oh I love it! The colors are beautiful!!
This is incredible!! I am going to try this soon! Good job.
These look fabulous, Megan! So fun and colorful! Perfect for your office and between those beautiful lamps you have.
love this! it's such an awesome idea! could be used for so many places nursery, office, kitchen, etc!
good job meghan!
Wowsers, that is so cute! Great idea, I love the way you grouped the different colors.
Girl. That is adorable!!! I already have some fun punches so now I am thinking and thinking! Too darn cute.
That is awesome. Four looks so much more striking than one canvas!
I absolutely love it!! looks amazing!
Wow, that turned out great! It really looks great in your office. Nice job!
Wow! Such a great idea to put them on a canvas! I love the way they turned out Megan!
I seriously love this and am so inspired!! You did an awesome job!
This is incredible! Love it!
what an amazing project! it looks SO good 🙂
Love this!!! And, it would definitely be an awesome Valentine's Day decoration for me next year. I do have a question… Where did you get those adorable blue lamps? I LOVE them!!!
Happy Wednesday,
Kristin
theocdlifestyle.blogspot.com
Love this! Going to pick up the supplies today to do some for my kitchen!
I love this idea SO MUCH! Thanks for sharing! I can't wait to make one for my daughter's room! 🙂
I JUST finished this idea for our bedroom. I have recently changed the main base color of our bedding and walls to different shades of gray (oh-oh, sounds like a book title), so this is a needed burst of color. I am going to attempt some other paint chip ideas in the near future. Thanks for sharing.
I ran across your post over at IHeart Organizing for this super cute paint chip wall art! I just LOVE it.. such a great idea 🙂 I hope it's okay, I've featured your paint chip wall art on a frugal crafts round-up that I just finished. You can see it here:
http://jamiebrock.hubpages.com/hub/Frugal-Crafts-15-Easy-Craft-Ideas
I linked it to your post on IHeart Organizing but I can change the link to this page if you would like. I wish I had thought first that you may have posted it on your own site as well. Thank you so much for sharing this 🙂
I JUST finished this idea for our bedroom. I have recently changed the main base color of our bedding and walls to different shades of gray (oh-oh, sounds like a book title), so this is a needed burst of color. student accommodation london
Your wall art turned out so pretty and I've got this linked to my paint chips DIY post too today!
Anyone know what size canvas to use?? 🙁
I've seen some similar projects, but none that are 3 dimensional- I love yours!!!!
This is so gorgeous. I made an ombré heart using paint chips for my daughters room. It was actually a failed attempt at a cross stitch heart but I love how it turned out. Terrible photo but it's really huge. Canvas is 1m x 1m. http://www.pinterest.com/pin/495184921500328252/